The Culinary Connoisseur
Cookie Artistry
12
Feb
Feb
The latest trend in the cookie decorating is stenciling. Stenciling
on cookies is a quick and easy way of adding a pretty design to simple cookies.
There are lots of beautiful designs that will allow your creativity free rein. And
remember—don’t let fear of imperfection get in the way of having fun!
on cookies is a quick and easy way of adding a pretty design to simple cookies.
There are lots of beautiful designs that will allow your creativity free rein. And
remember—don’t let fear of imperfection get in the way of having fun!
To begin with you will need to bake and cool your
cookies. Here is one of our favorite sugar cookie recipes:
cookies. Here is one of our favorite sugar cookie recipes:
1 cup (2
sticks) margarine
sticks) margarine
1 cup sugar
1 large egg
1 teaspoon baking powder
1 teaspoon
pure vanilla extract
pure vanilla extract
3 cups flour
Preheat oven
to 350 degrees F.
to 350 degrees F.
Cream
margarine and sugar in your mixer bowl, scraping the sides of the bowl, if
necessary. Beat in the egg and vanilla
until well combined. Add the flour and
optional baking powder one cup at a time, mixing after each addition. Dough will be stiff.
margarine and sugar in your mixer bowl, scraping the sides of the bowl, if
necessary. Beat in the egg and vanilla
until well combined. Add the flour and
optional baking powder one cup at a time, mixing after each addition. Dough will be stiff.
Divide dough in half and roll out on a silicone mat, cut the cookies and lift the scraps. Never move the cookies; cookies that are
lifted and moved to a pan will inevitably be misshapen. Rolling out dough on a silicone mat will prevent this. Slide the Silpat right onto a sheet pan and bake in the preheated oven.
lifted and moved to a pan will inevitably be misshapen. Rolling out dough on a silicone mat will prevent this. Slide the Silpat right onto a sheet pan and bake in the preheated oven.
Bake the
cookies 8-10 minutes or
until they are lightly browned at the edges.
Remove and allow to cool 10 minutes.
Place the cookies on a rack to continue cooling. Wait for cookies to be completely cooled
before decorating.
cookies 8-10 minutes or
until they are lightly browned at the edges.
Remove and allow to cool 10 minutes.
Place the cookies on a rack to continue cooling. Wait for cookies to be completely cooled
before decorating.
Then you will need 1 recipe Royal Icing.
Royal Icing:
3 tablespoons meringue powder
3-4 cups (about 1 lb.) confectioners’ sugar
5 tablespoons warm water
Yield: 3 cups of
icing
icing
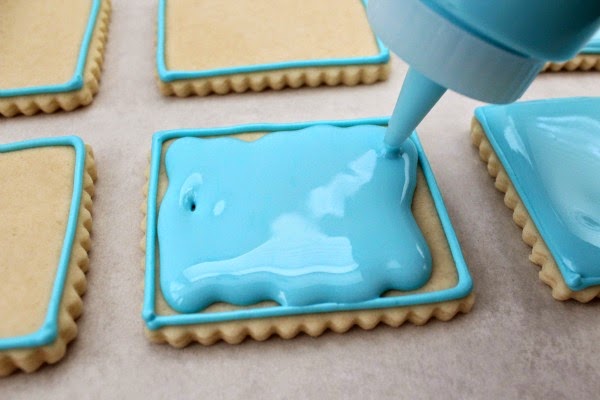
Begin by flooding your cookies with royal icing. Let them
dry overnight.
dry overnight.
Put aside remaining icing in an airtight container. Make
your stenciling icing a little bit thicker than flood icing by adding some more
confectioners’ sugar. When you drag a knife through the surface of the icing,
it should still hold its shape. Add a few drops of food color to the remaining
icing and stir thoroughly to combine.
your stenciling icing a little bit thicker than flood icing by adding some more
confectioners’ sugar. When you drag a knife through the surface of the icing,
it should still hold its shape. Add a few drops of food color to the remaining
icing and stir thoroughly to combine.
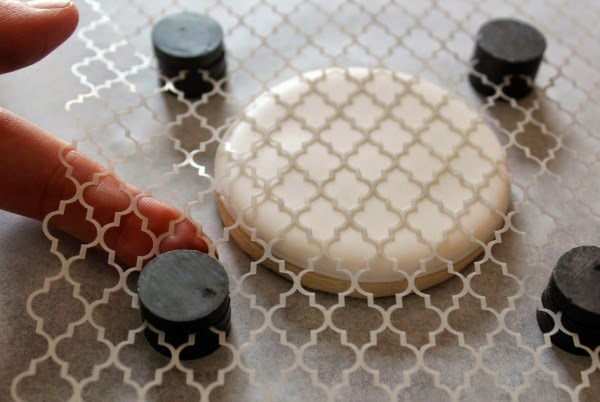
Place your stencil on the dry iced cookie. Work with one
cookie at a time. With one hand, hold the stencil firmly against the cookie
top. Check to make sure the stencil is still lying flush against the cookie top
coat in all areas. You can also place small round magnets above and below the
stencil outside the cookie to hold it in place. See photo so you know how to properly position
the magnets.
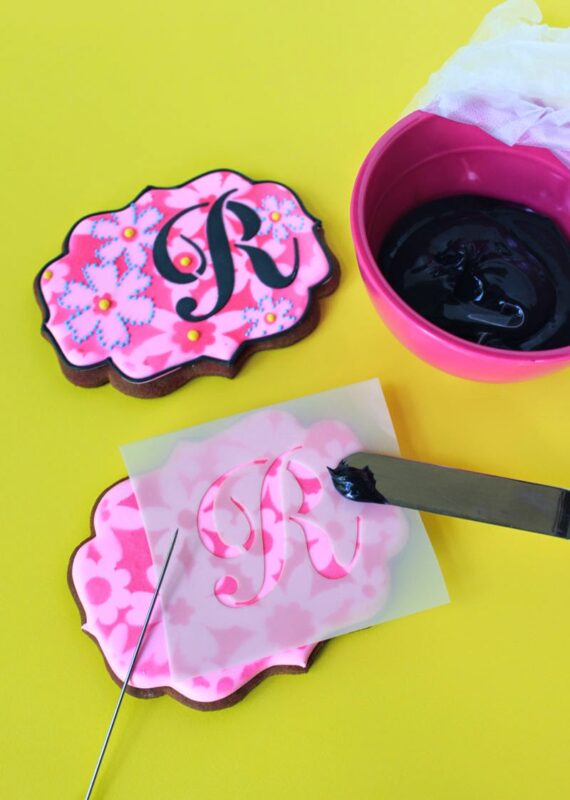 With the other hand, use a small offset spatula to spread
a very thin layer of icing over the openings in the stencil. The icing should
not be applied any thicker than the depth of the stencil, or you’ll leave peaks
in the icing when you lift off the stencil. However, be sure to apply enough
icing so you can’t see through to the top coat. Some cookie decorators use an
old credit card to spread the icing on the stencil. Play around a bit with
different tools to see which suits you best.
Most important: Do not move the stencil while applying
the icing or the resulting pattern will be blurry.
the icing or the resulting pattern will be blurry.
 Lift the stencil slowly and steadily off the cookie; then
wipe any icing off the bottom of the stencil before proceeding to the next
cookie. For the sharpest patterns, wash and thoroughly dry the stencil after
every 2 or 3 cookies. Do not rub the stencil dry, or you can damage the
stencil. Instead, lay it flat between sheets of paper towels and gently pat
dry.
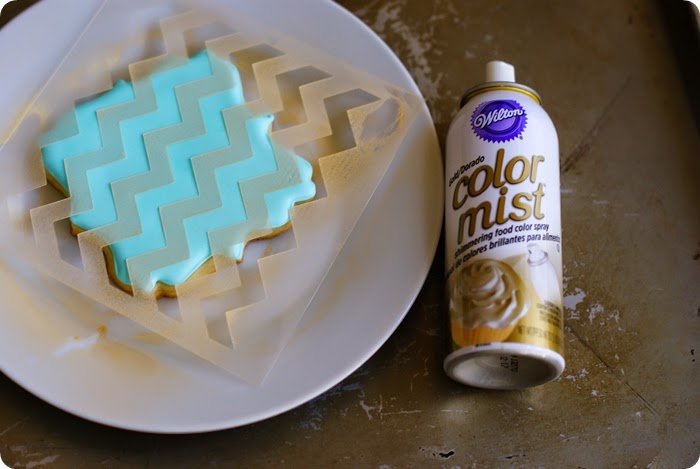
You can also use color mist or diluted paste food color
and a stenciling brush to fill in a stencil. Place the stencil on the cookie in
the same manner as directed above. Hold the spray approximately 12 inches away
from the cookie and spray lightly back and forth. Do not over-spray or the
color will run under the stencil. Carefully remove the stencil and allow the
food color to dry.