The Culinary Connoisseur
Chocolate Molds 101
Creating chocolates for your Purim mishloach
manos is easy if you keep a few simple things in mind.
1. Water and chocolate do not get along.
Chocolate is an oil based food. Moisture from water or steam can
cause it to have a dull finish, and may cause it to clump so it will
not pour and mold properly. Likewise, adding liquid food color to
chocolate will cause it to “seize” and never melt again. Special,
oil-based candy color must be used to color white coating chocolate.
The best method for adding food color to chocolate is by removing a
small portion after the chocolate has been melted and stirring in the
color until the desired shade is reached. Then add that portion back
into the rest of the chocolate. This will ensure your chocolate
colors evenly.
2. Too much heat will ruin your chocolate.
Chocolate melts between 88 and 100 degrees F. This is very easy to
remember because it just so happens that your body temperature is
normally 98.6 degrees, which means if you hold chocolate in your
hands, it will melt. Chocolate doesn’t like being boiled any more
than you do. So avoid overheating chocolate.
Using baking or “coating” chocolate will
help avoid the problems associated with overheated chocolate. This
coating or “baking chocolate” is not real chocolate and is not so
temperamental if heated to higher temperatures. There are lots of
different qualities in coating chocolate. Choose one that melts well
and tastes good.
help avoid the problems associated with overheated chocolate. This
coating or “baking chocolate” is not real chocolate and is not so
temperamental if heated to higher temperatures. There are lots of
different qualities in coating chocolate. Choose one that melts well
and tastes good.
3. If you treat chocolate right it will last
and last and last. That means you can store it for long periods of
time and reuse it, melt it and re-melt many times over. Any chocolate
left from a project can be wrapped in paper or plastic and stored in
your pantry or anywhere far from the stove.
4. How much chocolate do you need? An average
mold or lollipop uses less than 1 ounce. A bite sized mold uses 1/2
ounce. Therefore, since 16 ounces equals 1 pound, which we’re sure
you remember from school, you will get about 16 lollipops or 32 bite
size chocolates from a pound of chocolate. It is a good guide to
start with 1 pound. Remember, whatever is left over can be left to
harden and remelted for another use.
5. There are 2 methods of melting chocolate and
neither one of them is melting it in the oven in a foil pan!
A. Melting in a microwave
Put 1 pound of chopped chocolate in a bowl.
Microwave on half or medium power for 1 minute, then stir. It will
not be all melted at this point. Do it again. Repeat the process
until most of the chocolate is melted and just a few chunks remain.
Continue stirring the chocolate until it is all melted. Remember
don’t overcook your chocolate.
Microwave on half or medium power for 1 minute, then stir. It will
not be all melted at this point. Do it again. Repeat the process
until most of the chocolate is melted and just a few chunks remain.
Continue stirring the chocolate until it is all melted. Remember
don’t overcook your chocolate.
B. Melting in a double boiler
Put 1 pound of chopped chocolate in the top of
a double boiler or a heatproof bowl and set it on top of another pan
that has the water in it. Heat the water on low–do not bring it to a
boil, and stir as it starts to melt. This will take around 15
minutes, so you need to be patient.
a double boiler or a heatproof bowl and set it on top of another pan
that has the water in it. Heat the water on low–do not bring it to a
boil, and stir as it starts to melt. This will take around 15
minutes, so you need to be patient.
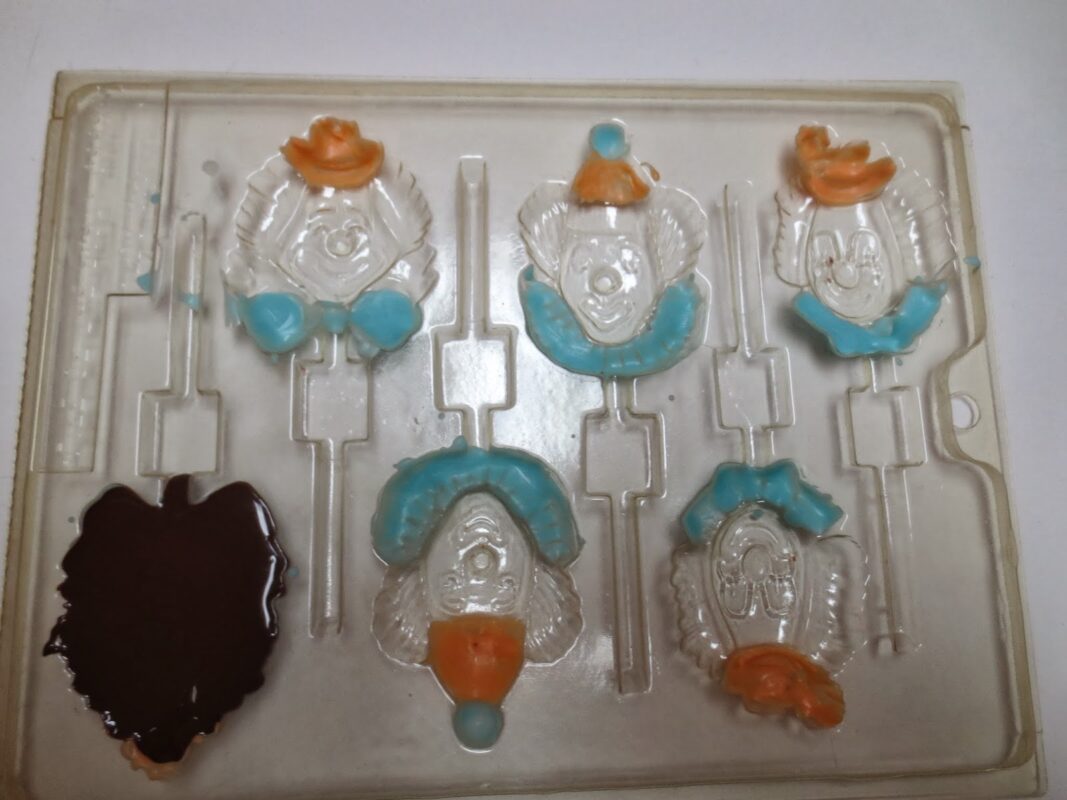
6. Filling Molds. You can spoon melted
chocolate into the mold cavities, pour it from heat-proof measuring
cup or gently squeeze the chocolate out using a squeeze bottle (this
is definitely the easiest). Then hold both sides of the mold and tap
it lightly on the table top. This will level out the chocolate and
remove any air bubbles. If you are making lollipops, now insert the
lollipop sticks into the mold, and with your finger roll the stick in
its mold position. This will coat the stick all the way around with
chocolate so the lollipop will not fall off when being eaten.
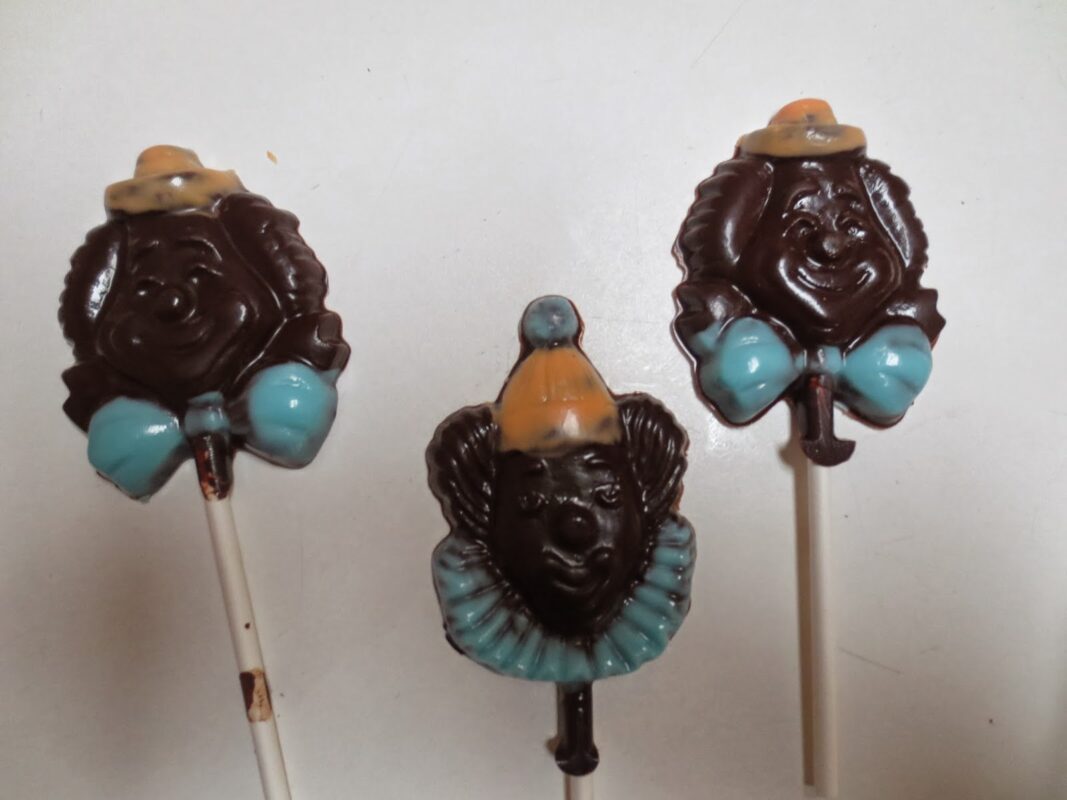
 To make molds using different colors, melt
Kandy Melts and use a small paintbrush to carefully fill in just the
areas of the mold where you would like that color to appear. Tap the
mold as directed and allow the color to harden before adding any
additional colors. Do each color separately using a clean brush. Or
you can use white chocolate you have colored as directed above and
paint each color as directed.
7. Put the filled mold into the freezer on a
flat surface. Small candies or bite size items will be ready to
remove in about 5 minutes; larger pieces in about 10. Leaving it in
the freezer longer than necessary is no problem at all. A freezer
sets the chocolate quickly, makes it easier to remove the chocolate
from the mold and gives a shiny surface finish.
When you take the mold out of the freezer turn
it upside down and gently tap it on the table. The candy should drop
right out.
it upside down and gently tap it on the table. The candy should drop
right out.
8. Clean molds in soapy water, rinse thoroughly
and dry. Molds are NOT dishwasher safe! Remove excess chocolate from
containers and squeeze bottles while still melted, then place the
containers in freezer until the chocolate is hard. The chocolate will
come away cleanly when the container is flexed or bent.
9. Store extra chocolate in a cool dry place,
not in the refrigerator. Remember you can reuse chocolate many times.